• Skip to primary navigation
  • Skip to main content
  • Skip to primary sidebar
  • Skip to footer
  • My account
  • Cart
  • Checkout

T.F. Woodcraft

FacebookInstagram
  • Home
  • Shop
  • Wood Types
  • Contact Us
  • Blog

Uncategorized

Japanese Embroidery Frame set up

May 30, 2023

www.susanskitchenette.com
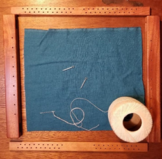
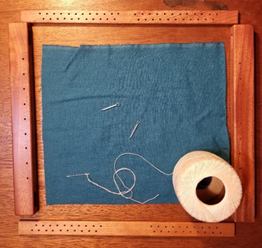
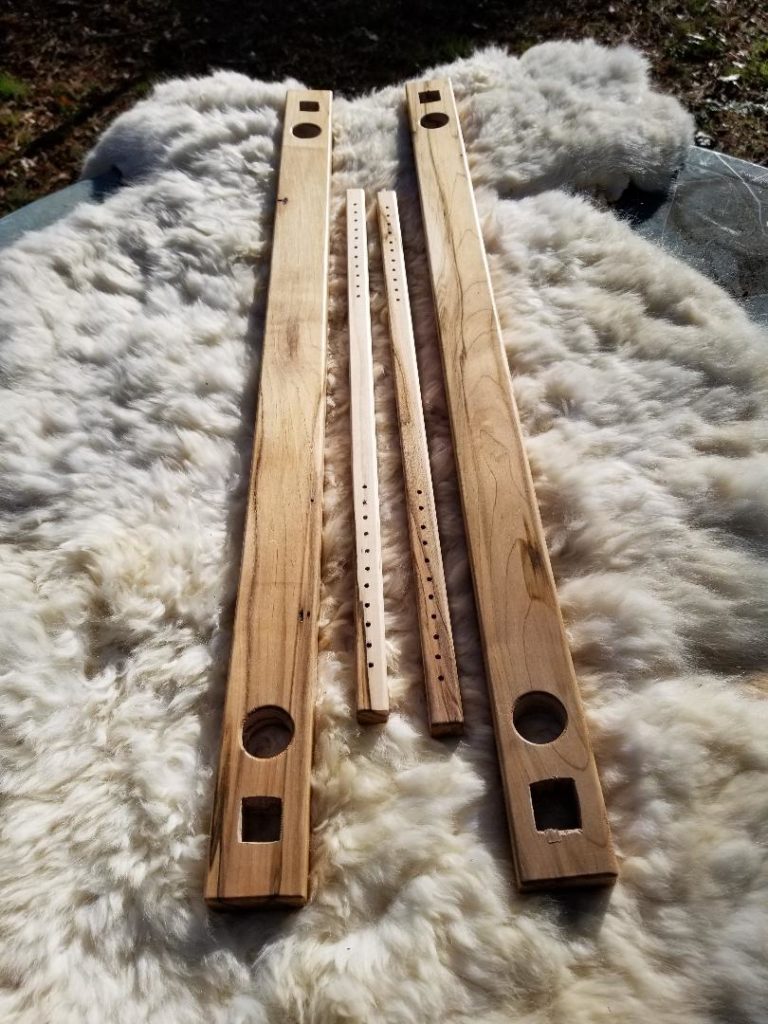
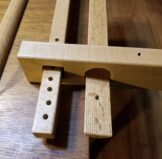
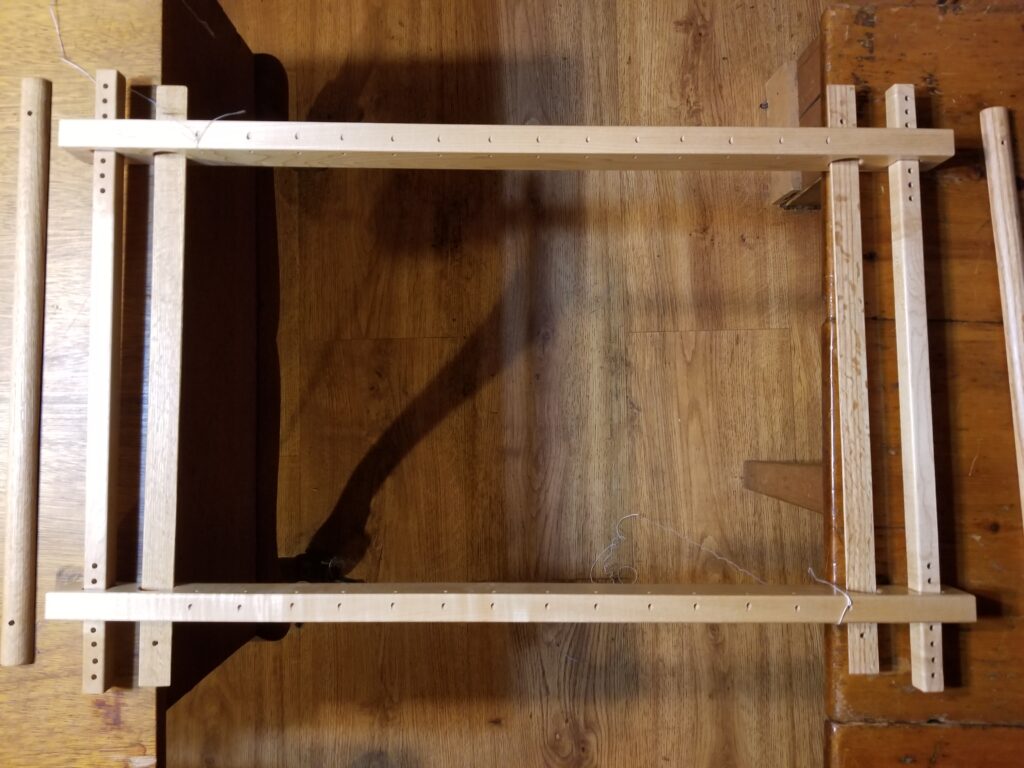
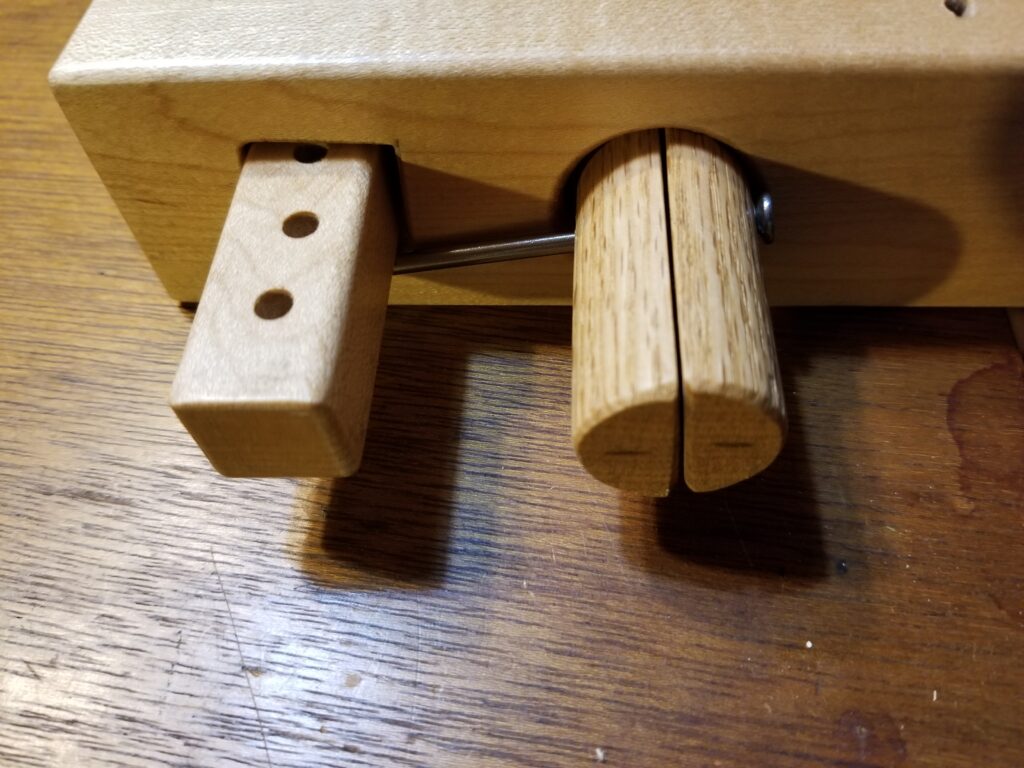
  1. Set up frame with half of dowel through the holes. The dowels are matched, and have marks identifying pairs. I have the frame sitting on the edge of a pair of tables so the fabric can drape down between the ends.

2. Place fabric over half dowel and slide in other half. Make sure you get the seam between the embroidery fabric and the mounting fabric straight.

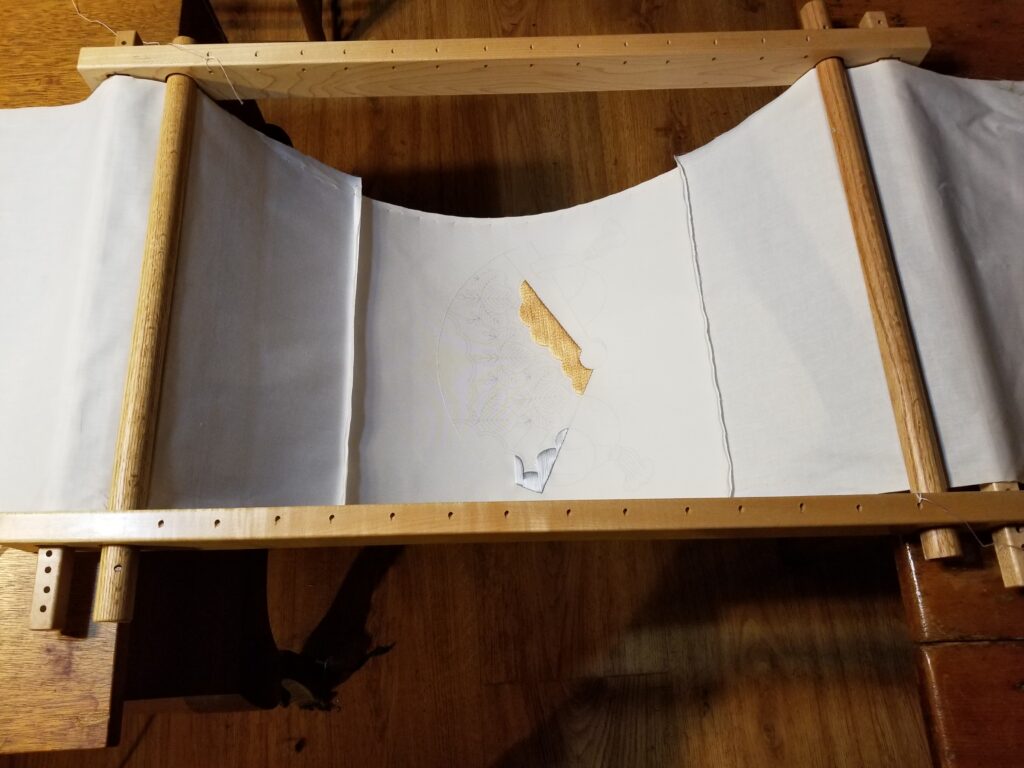
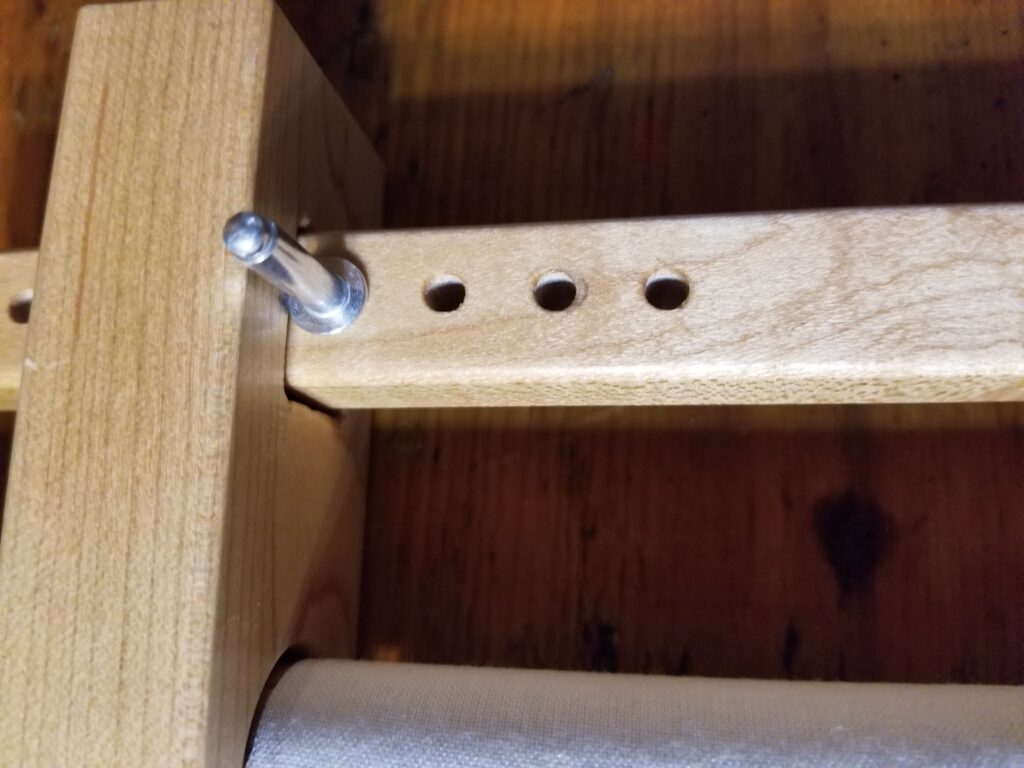
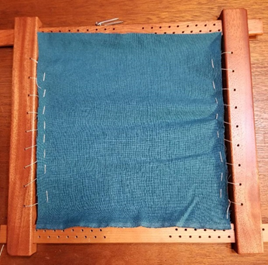
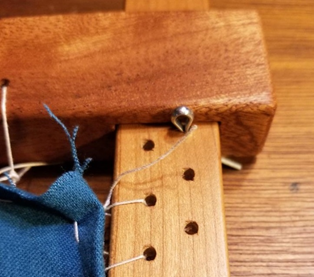
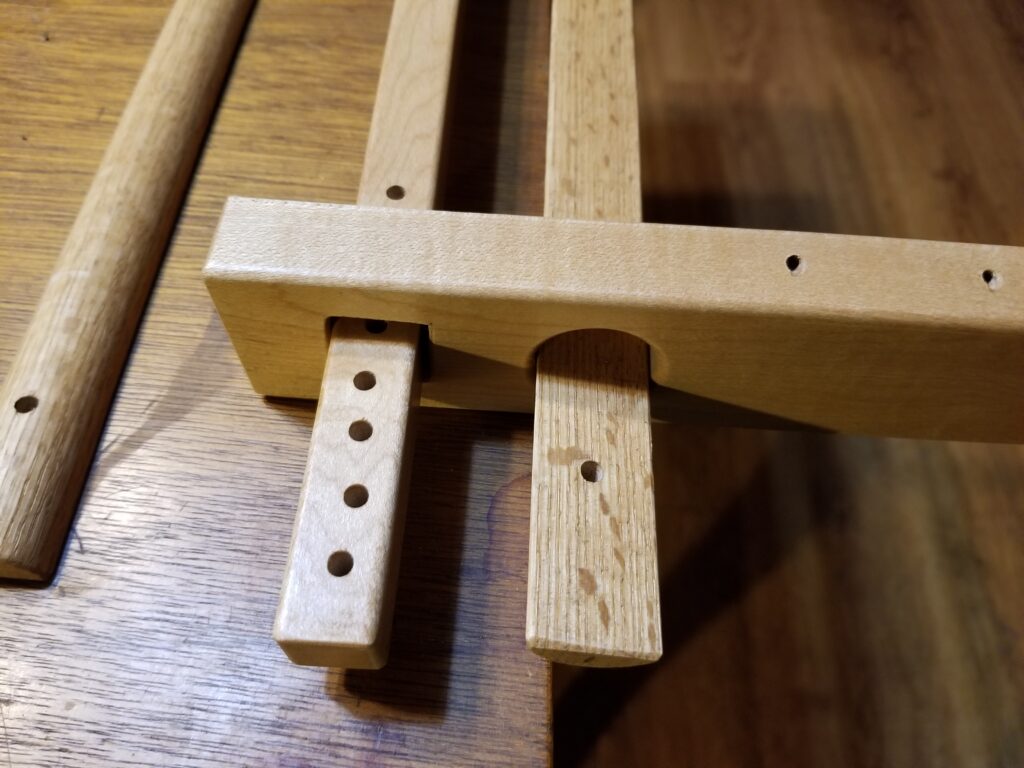
3. Roll the dowels equally towards the ends so the fabric is on the top and secure with a nail through the hole and trapped underneath the stretcher bar. You can see the marks showing the pair of dowels in this picture.

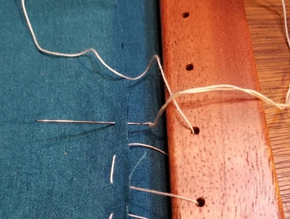
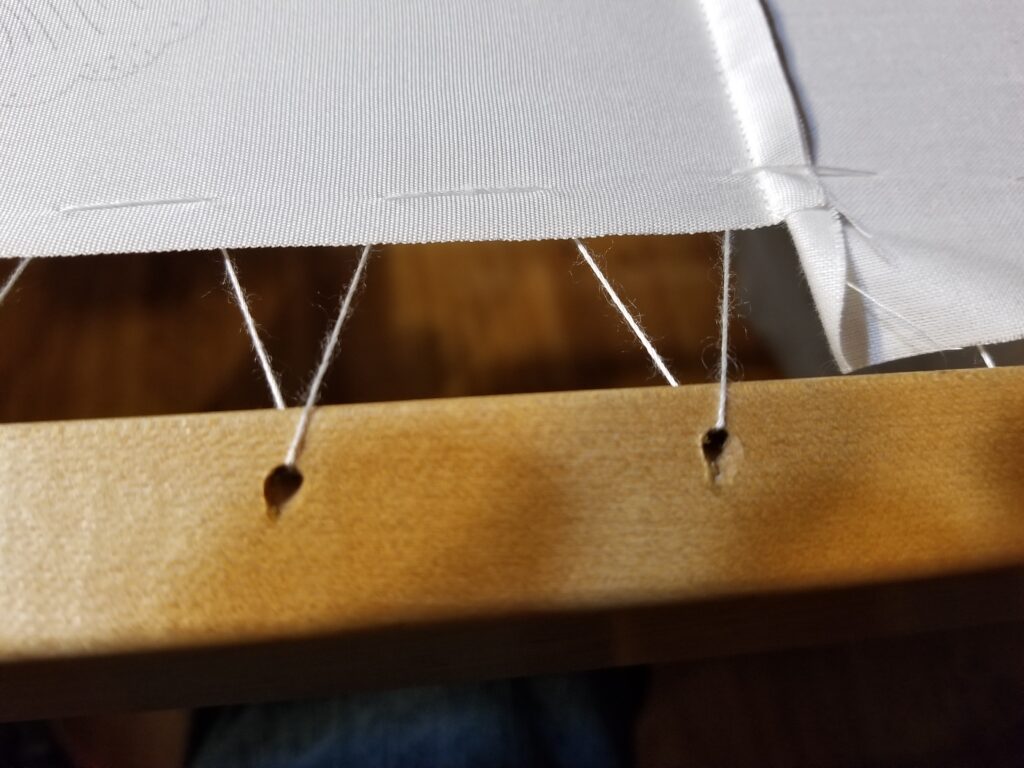
4. Sew fabric to frame. This pattern works very well. Make sure your thread travels along the top of the fabric for about one third to one half the distance between the holes. That will keep the fabric from scalloping.

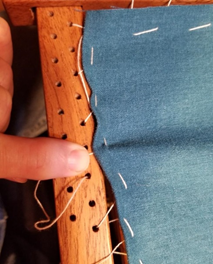
5. Finally, place pins into the stretcher bars to tighten the fabric. If the holes are not quite in the right place you can wedge a small piece of wood between the pin and the frame. A small piece of a chop stick works well. The fabric should be quite tight.

Atlantian Pennsic in your Backyard

August 7, 2020

We will be holding a zoom meeting today 8/7/20 at 2:00.

Tanya Sanders is inviting you to a scheduled Zoom meeting.

Topic: Tanya Sanders’ Zoom Meeting
Time: Aug 7, 2020 02:00 PM Eastern Time (US and Canada)

Join Zoom Meeting
https://us02web.zoom.us/j/89529087704?pwd=SVF5ZjMrcnpocC9WN0lzQ21SSXZNdz09

Meeting ID: 895 2908 7704
Passcode: 7tQj94

colorfastness in wood

February 26, 2020

Many of the exotic woods we work with have beautiful colors. How long will those color last in the pieces you buy? I have to say right from the start that red is an unstable color. You can see that in just about every town you drive through. There is always a store with a sign that has lost its red color. You can even find stop signs that are so bleached out they are no longer recognizable as red.

So where does that leave you with your beautiful new purpleheart slate frame, or padauk trestle stand? Most wood darkens with age. However, that trend does not lead all the way to black in most woods. Purpleheart starts out a grayish lavender color. By the time you get it, it is probably a lovely deep purple color. That color can last up to 10 years before it will settle into a dark brown. different boards will change color at different rates no matter how we treat them. Eventually though, your purpleheart and padauk are going to darken into brown.

purpleheart bowl that is destined to turn to brown eventually.

There are a couple things that can be done to slow down that progression. First, when we make something large out of purpleheart, I give it a coat of spar varnish. This is one of the few finishes that contains a uv block. Then the piece gets another 3 or 4 coats of polyurethane. The more coats of finish the better. Now for what you can do. Purpleheart and padauk do not like sunlight. Try to keep them out of direct sunlight, or large amounts of reflected light. We could see the darkening of a padauk bowl that was kept in a white canvas tent for over a week. Enjoy the beautiful color while you have it.

The wood data-base has an article on color fastness that has a convenient list at the end showing the various woods and their colorfastness.

Preventing Color Changes in Exotic Woods

So generally love the color you have now, and try to protect it from direct sunlight.

How to mount fabric to your slate frame

January 4, 2020

Congratulations on your purchase of a slate frame.  If you are new to this method of holding fabric you will find the added tension can add a great deal of artistry to your finished pieces.

Materials: frame, ground fabric, needle, medium weight thread, pins included with frame. The stretcher bars and the ones with two rows of holes.

materials to mount your fabric.

 Slide stretcher bars through the side rails of the frame. Thread needle and sew one side of your ground fabric to one of the side rails. The edges of the fabric do not need to be finished, but it can’t hurt. The fabric behind the stitching is only there to make it easier to see the thread. It seems to work best if you make the stitch come up through the fabric and then travel along the fabric for 1/3 of the length between the holes before going back down through the fabric and then back to the rail. That keeps all the pressure on the fabric from going through one hole and possible tearing the cloth.


After sewing both sides you are ready to sew the ends of the fabric to the stretcher bars. You can use any of the holes that are drilled in the stretcher.  Tighten the sewing to the stretcher bars as far as you can without tearing the fabric.

After you have sewn all four sides push the side rails apart and place the pins in the furthest hole you can reach without tearing the cloth. Spreading the back of the pin will keep it from slipping out no matter how you move the frame.

Now you are ready to start your embroidery project. Good luck, and have fun.

First Trials

December 9, 2019

Welcome everyone to our blog. This is going to be a view of our business from the personal side. About three years ago I decided to take a class in Japanese Embroidery with a friend. After picking up most of the smaller necessary tools like the tekobari and awl, I was faced with getting a Japanese Embroidery Frame. since my father had a pretty well equipped wood shop, I thought it would be easy to make my own frame.

Enter my son, Matthew. Between us we managed to make a pretty good approximation of a JE Frame, but not one that we were especially proud of.

While the wood was a beautiful example of ambosia maple and the holes were all in the right place, we were not thrilled with the square holes in the end of the side rails. If you look closely at the picture you can see some pretty bad chipping around the hole. We had used a hollow chisel mortiser to cut those holes, and it was neither pretty nor easy.

At that point Matthew decided we needed a CNC Router to do that kind of work, and we became the proud owners of a Shapeoko machine. The shape of the holes in the side rails immediately improved as you can see from the picture below of a purpleheart frame.

He even came up with a way to make the dowels out of matching wood. Up until then we had been buying one inch dowels from the local home improvement store and trying to cut them in half lengthwise. That, by the way, is also hard. Trying to get the dowel to stay upright while running it through a band saw turned out to be quite a trick. 

So our first really successful Japanese Embroidery Frames are now behind us and we have a consistent and moderately quick and easy method of making them. We only needed to invest in a new CNC router, a one inch bullnose bit for the shaper, and finally a new drill press. The picture below is of a Santos mahogany frame.


sidebar

Blog Sidebar

Recent Posts

  • Japanese Embroidery Frame set up
  • Atlantian Pennsic in your Backyard
  • colorfastness in wood
  • How to mount fabric to your slate frame
  • First Trials

Recent Comments

  • Michelle on Folding spoon
  • Heather Long on Embroidery trestle stand
  • Kristin Silverman on Slate Frames
  • Chelsea on Nostepinne, Yarn ball winder
  • Cheryl on Double Lucet

Archives

  • May 2023
  • August 2020
  • February 2020
  • January 2020
  • December 2019

Categories

  • Uncategorized

Meta

  • Log in
  • Entries feed
  • Comments feed
  • WordPress.org

Footer

Contact Us

Email: tfwoodcraft@gmail.com

Payment Information

We accept PayPal and all major credit cards.

Transactions are performed via a SSL server to ensure your privacy.

Shop by Popular Search Terms

Bench